How to Use Preview
Edit your Shout on the Preview page, then choose when to publish it on the Schedule Selector page.
After creating a Shout via Generate from URL, Generate from Store, or Craft Manually, you'll land on the Preview page. This is where you finalize your Shout before scheduling.
Step 2: Review and Finalize Your Shout
The Preview page is where you finalize your Shout before scheduling or publishing. This is Step 2 of 3 in the Create a Shout process.
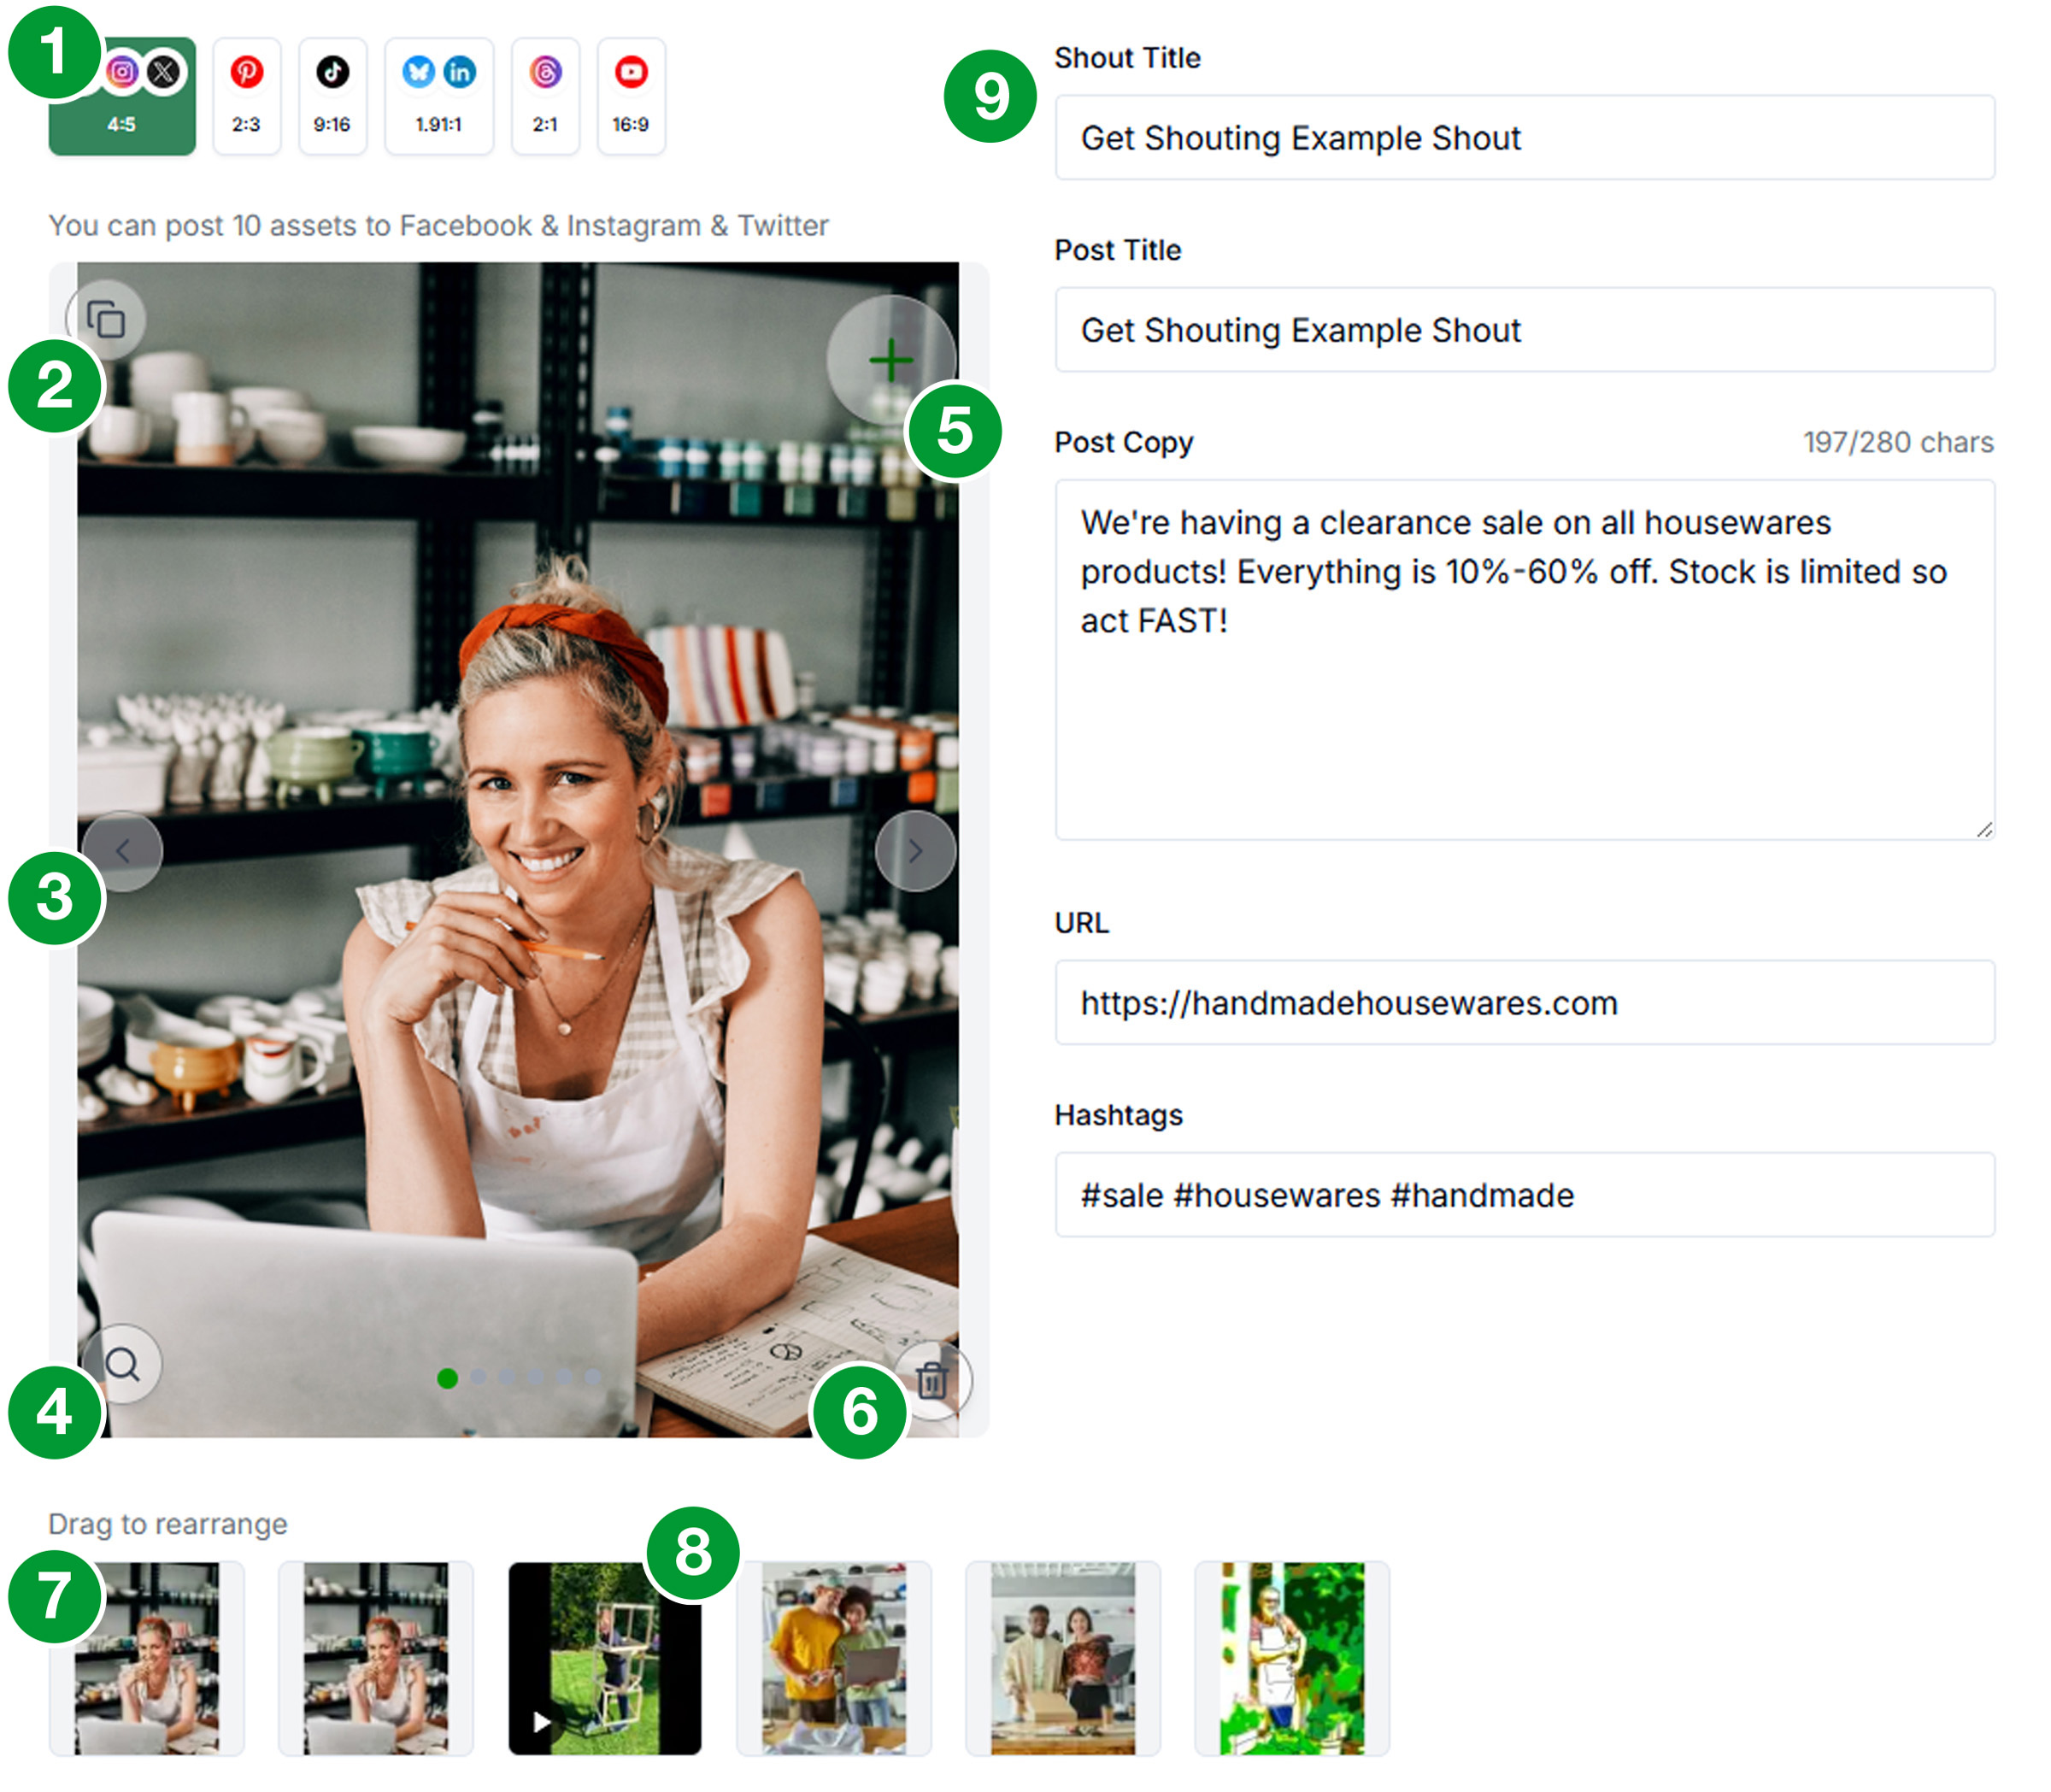
The Interface
- Aspect Ratio Switcher Social platforms are organized by aspect ratio. Click the different aspect ratio buttons to see the different views. Make sure you edit the zoom and cropping of your assets for each aspect ratio to ensure you are publishing what you want. We call this view window the Asset Preview.
- Duplicate The Duplicate button will create a copy of the current asset. This is useful if you want to show closeups of an image.
- Previous / Next Cycle through the different assets in your posts. You can even preview videos when added to your posts.
- Zoom Zoom in/out on your image. Drag the image to rearrange or crop.
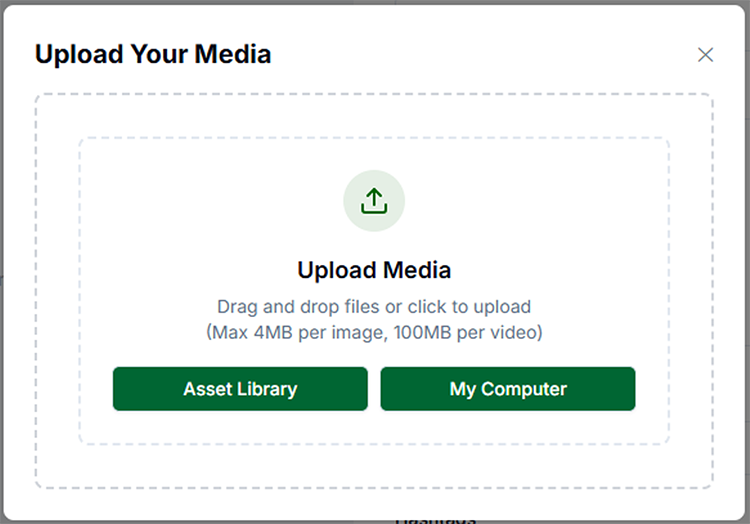
- + The "+" icon in the top right of the Asset Preview adds assets. Clicking it will open the Upload Box. You can upload new images or videos by selecting them from your computer or Asset Library. You can also drag new assets onto the Upload Box. Once an asset has been added to your Shout, it is also added to your Asset Library.
- Trash The Trash button will delete the asset from your Shout. If the Shout has not been saved or published, and the asset is not used in any other Shouts, it will also delete it from your Asset Library.
- Thumbnail View Thumbnail view is used to show you the order of your assets. You can drag to rearrange, duplicate, and delete assets directly in the Thumbnail View.
- Video Video thumbnails show with a Play icon in the lower left corner. You can play videos in the Asset Previewer.
- Text Fields: Based on the individual platform capabilities, we combine the fields to properly format your posts.
Shout Title Shout title is the name of your Shout. This is only used internally, and is the title you will see your Shout displayed in the My Shouts section.
Post Title The title of your post publishes as the post title on some platforms. On other platforms, it is folded into the post body.
Post Copy Post copy is the main caption or post text. This is the text that will be displayed on the social platform. Use Shift+Enter to add line breaks. Remember to include a Call to Action (CTA). Shorter posts are generally better; targeting 150-300 characters total for most posts. The Post Copy will be the same for all platforms (length permitting). There is a helpful character counter that includes Post Title, Post Copy, URL, and Hashtags.
URL Link to include (e.g., product URL). Depending on the platform this link may be included in the post copy, or as a functioning link. Hashtags Add relevant hashtags. Generally you should aim for a maximum of 3 hashtags.
Add & Manage Assets
- Add assets: Upload, or select from your Asset Library. Not all platforms support all asset types. Some platforms don't support videos while others don't support images. If you have both images and videos in your shout, only the allowed assets will be published to the individual platform; e.g. we make sure you don't try to publish an image to YouTube.
- Reorder: Drag and drop to change the order of images/videos

- Aspect Ratio Views Click the different aspect ratio buttons to see the different views and edit the zoom and cropping of your assets.
- Delete: Click the trash icon to remove an asset
- Text Only: You can make text only posts to the platforms that support that sort of thing.
- Schedule: When satisfied, click "Schedule My Shout". You'll be taken to the Schedule Selector page. See How to Use Schedule Selector for detailed instructions.