How to Connect
Your WooCommerce Store
Create Posts and Ads, or up to a month's worth of Posts directly from your connected store.
Connect via WooCommerce Plugin (Recommended) Connect via Manual API Key Entry
Prerequisites
- WordPress site with WooCommerce 5.0 or higher
- PHP 7.4 or higher
- HTTPS enabled (required for secure API communication)
- Pretty permalinks enabled (Settings → Permalinks in WordPress)
- A Get Shouting account (create at getshouting.app if needed)
Connection Methods
- Easiest: Install the Get Shouting Plugin (Recommended — automatic setup)
- Option 2: Manual API Key Entry (For users who prefer manual control)
Easiest Way: Plugin Connection (Recommended)
The Get Shouting plugin (v1.1.0+) automatically generates API keys, handles the connection flow, adds SMS marketing consent to checkout, and enables Abandoned Cart journeys. No manual API key generation required.
Plugin v1.1.0+ — What's included
- Automatic API key generation — no copying/pasting keys
- SMS marketing consent checkbox at checkout (TCPA-compliant)
- Abandoned Cart journeys — hourly scanner fires cart reminders with a direct cart link
Requires WooCommerce 8.9+ for SMS consent in block-based checkout; 5.0+ for basic product/order sync.
Log in to Get Shouting
Log in to your WordPress admin panel
Go to Plugins → Add New
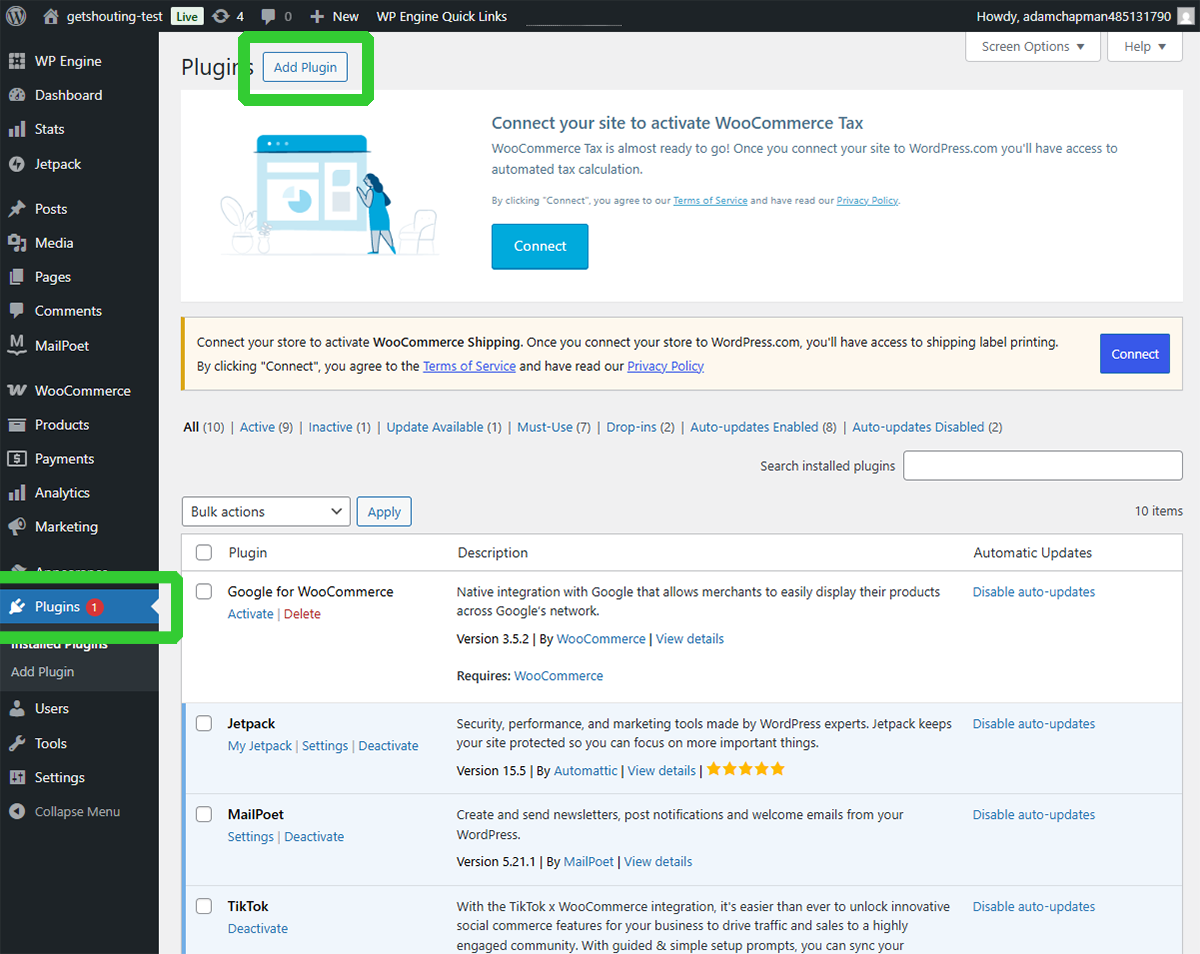
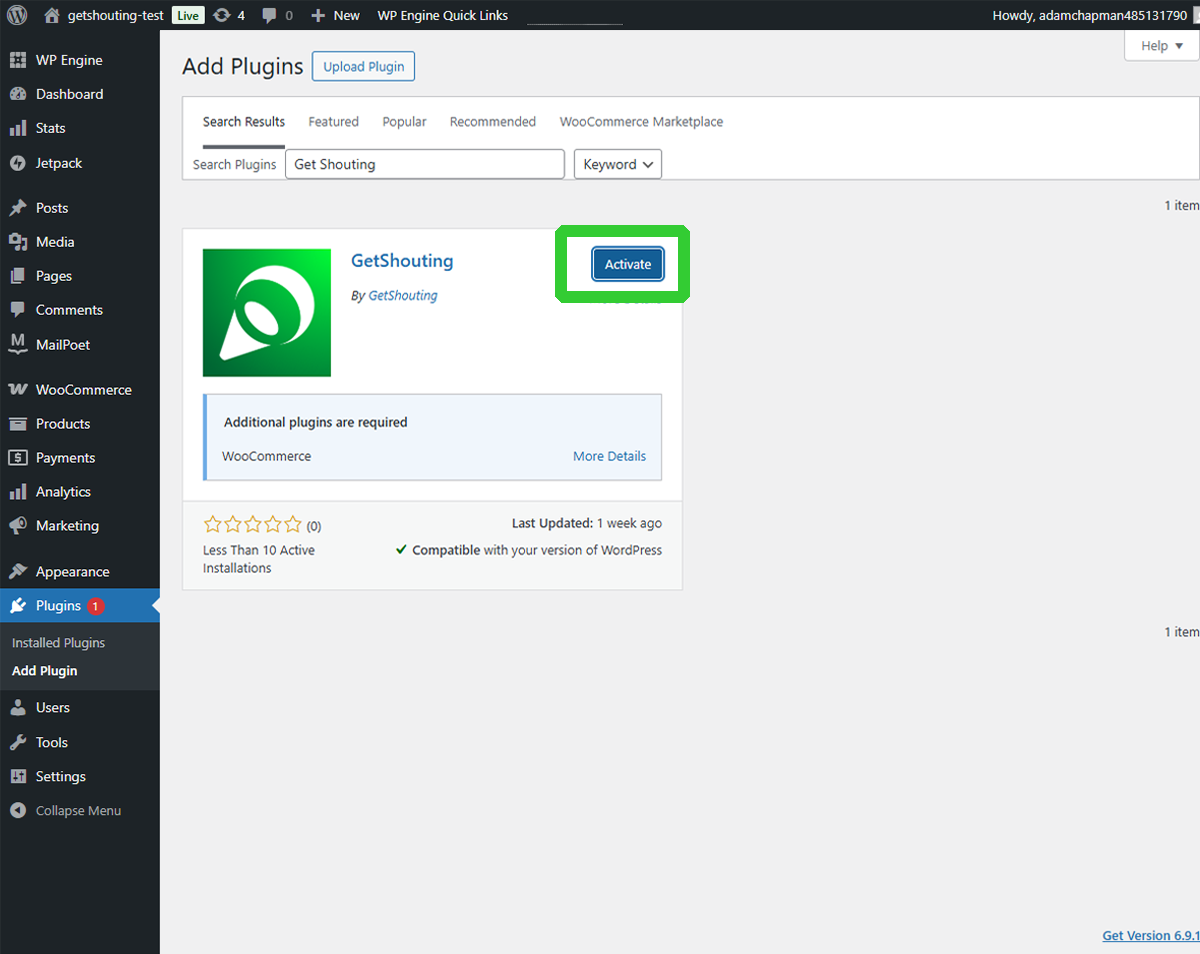
Search for "Get Shouting"
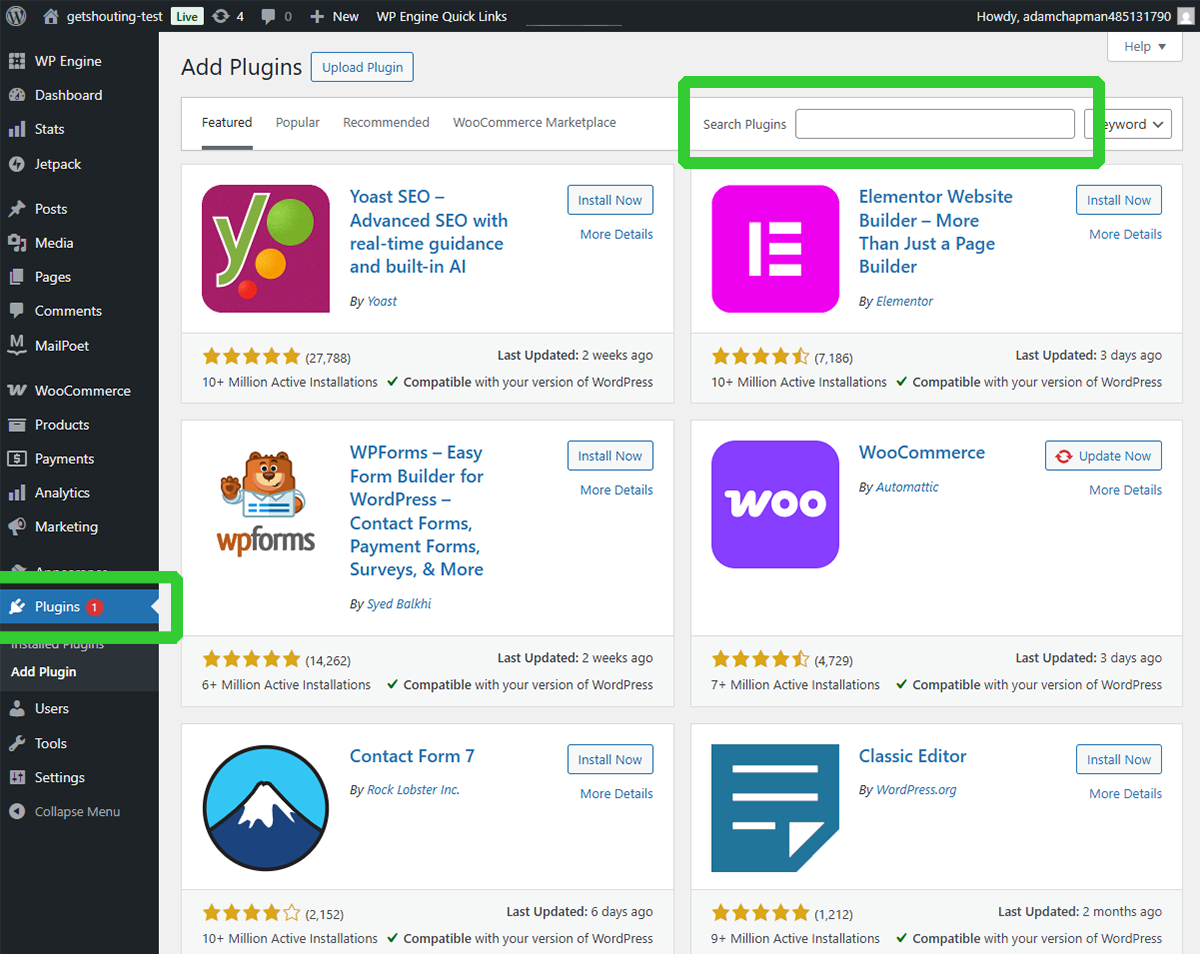
Click "Install Now" on the Get Shouting plugin

Click "Activate" after installation completes
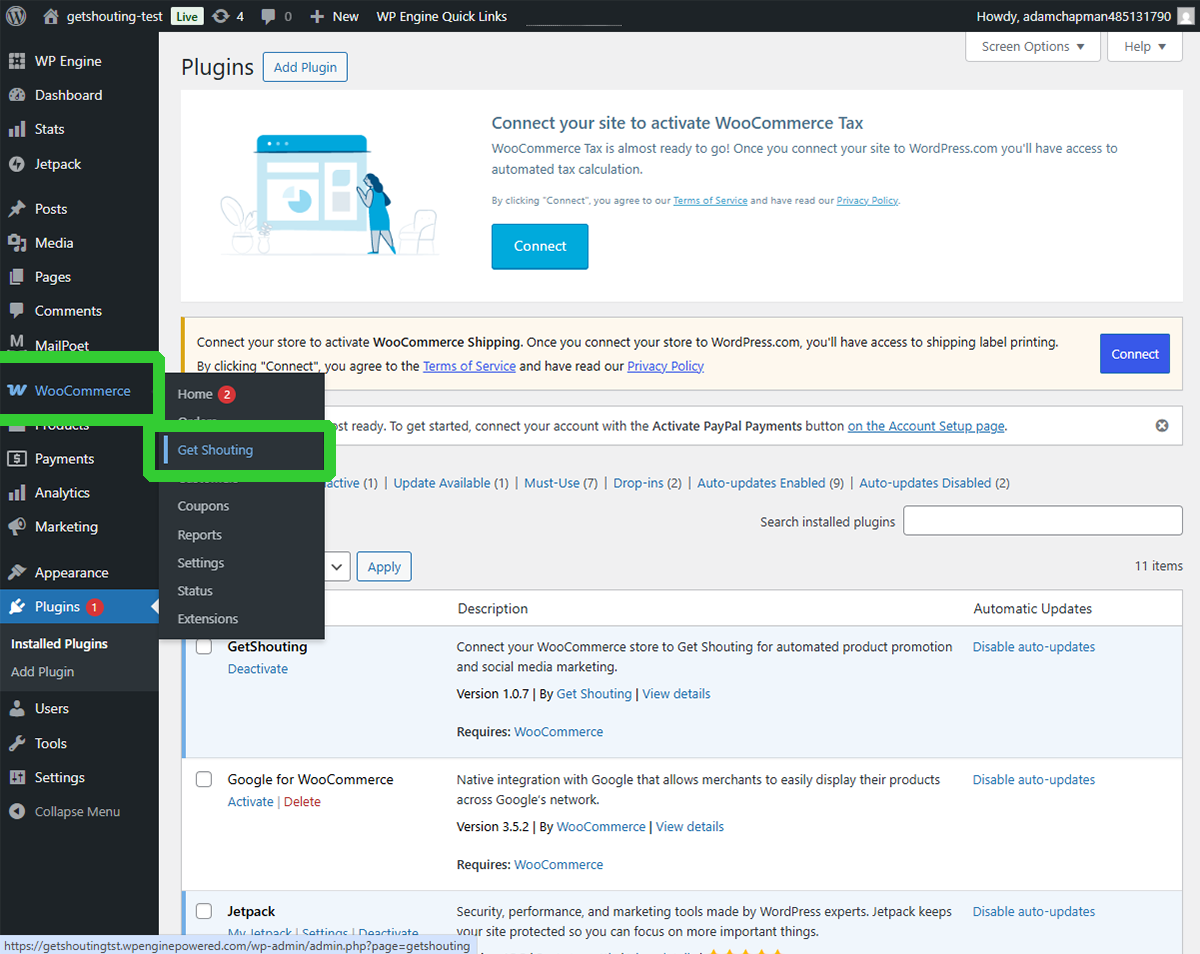
In the WordPress left navigation menu, when you hover over WooCommerce you will see a submenu with Get Shouting
Click Get Shouting
Click Connect to Get Shouting
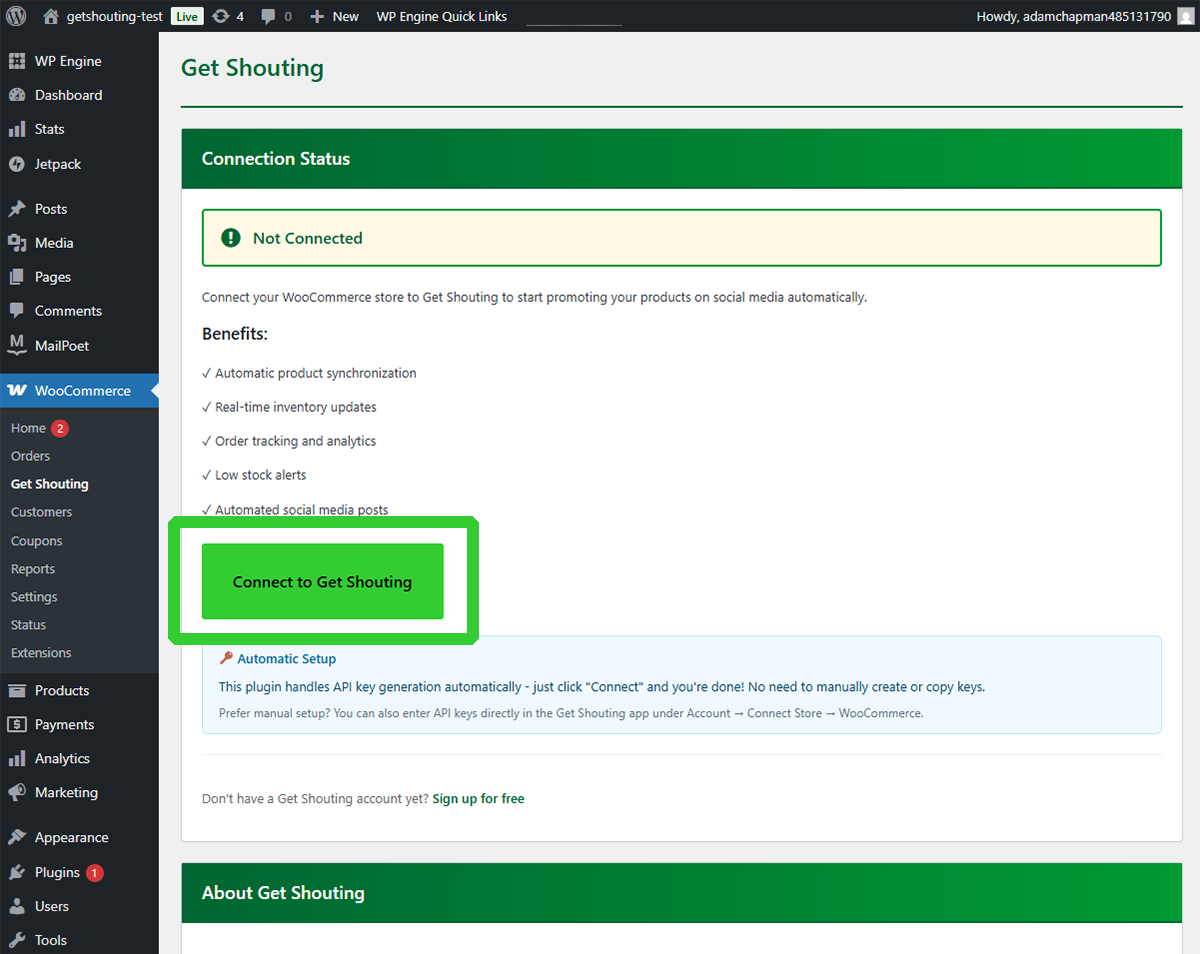
You will be redirected to the Get Shouting website to complete the connection
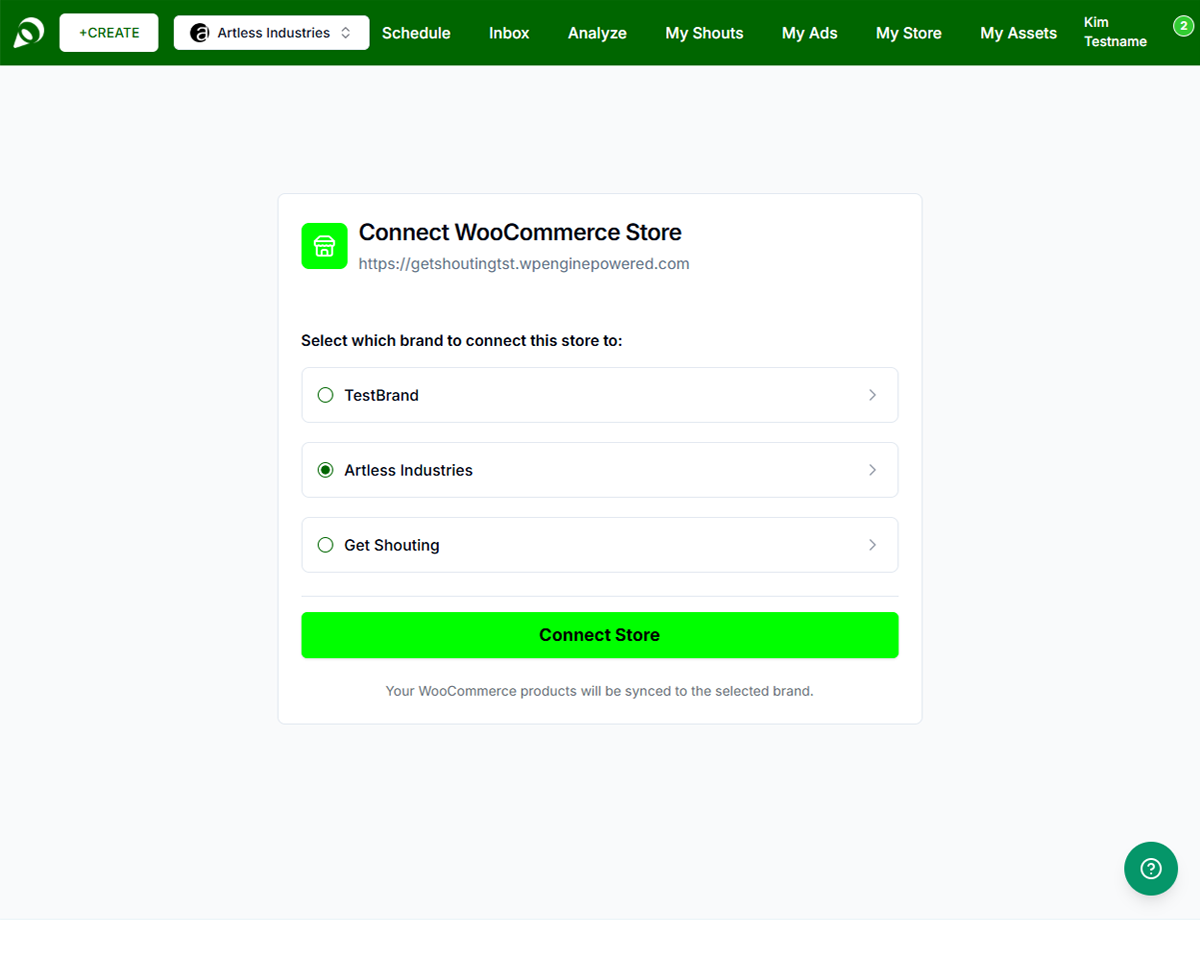
If not logged in, you'll see the Get Shouting sign-in page. Log in with your existing account or create a new one.
If you have multiple brands, choose which brand to connect to this WooCommerce store.
After successful connection, you'll be redirected to Get Shouting Account page. The My Store tab should show your WooCommerce store as connected with status "Active". Products sync automatically. You will also have a new item in the navigation: My Store.
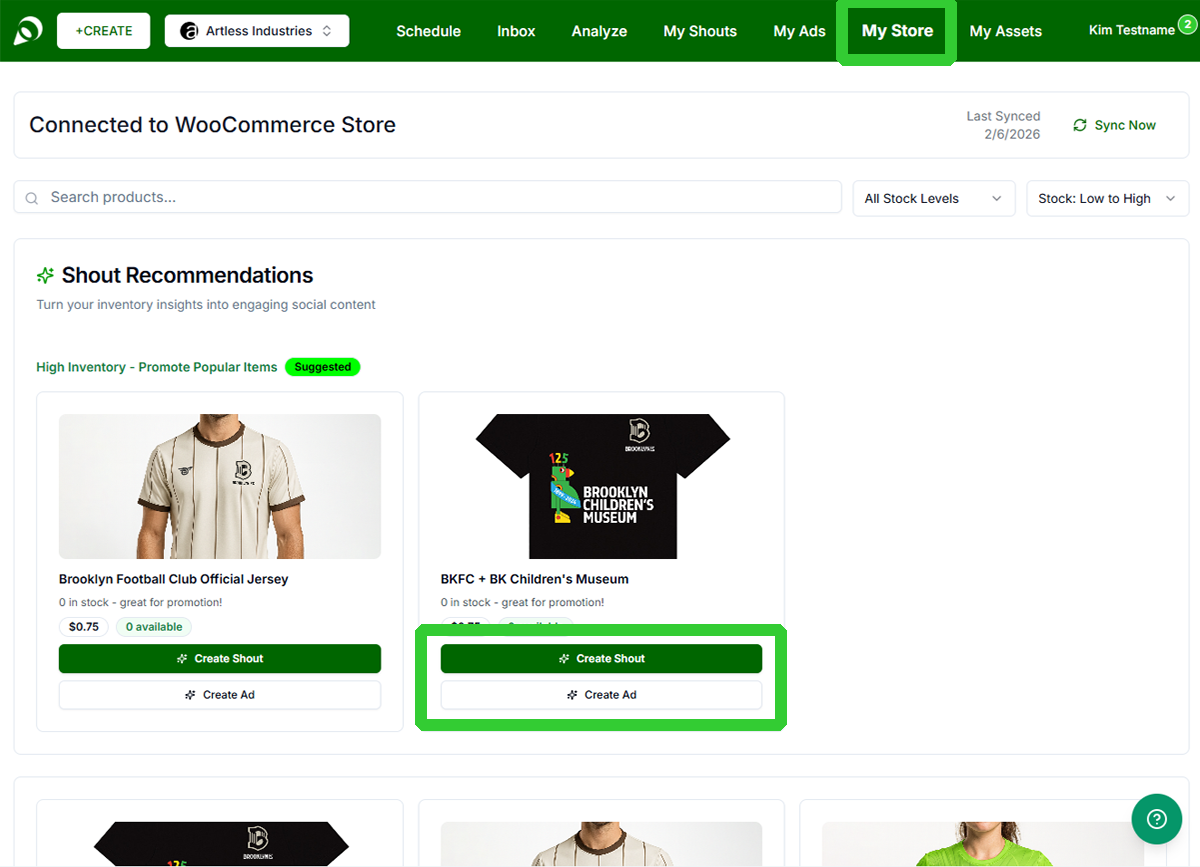
From the My Store section, you can create a Shout (what we call a collection of posts) or an Ad directly from your store listings. Your Shouts will automatically generate promotional copy using your images, titles, descriptions, and pricing.
SMS Consent & Abandoned Cart (Plugin v1.1.0+)
SMS Marketing Consent at Checkout
When the Get Shouting plugin v1.1.0+ is active, a checkbox appears at WooCommerce checkout:
"I agree to receive marketing text messages from [Your Store Name] at the number provided. Consent is not a condition of purchase. Reply STOP to unsubscribe."
When a customer checks this box and places an order, Get Shouting creates an SMS contact for them and sends a TCPA-compliant double opt-in confirmation. The customer must reply YES to complete the subscription before any marketing messages are sent.
The SMS consent checkbox requires WooCommerce 8.9+ for block-based checkout. Classic checkout is supported on WooCommerce 5.0+.
Abandoned Cart Journeys
The plugin runs an hourly background scan. When a shopper adds items to their cart, provides their email, and leaves without purchasing for 30+ minutes, Get Shouting fires an Abandoned Cart event and enrolls them in your Abandoned Cart journey.
- The journey email (or SMS) includes a direct cart recovery link so shoppers can return right where they left off
- Each cart fires at most once — completing or abandoning the same cart again does not re-enroll
- Works the same as Shopify abandoned cart journeys, with the same merge tags
Abandoned Cart journeys require plugin v1.1.0+, WooCommerce CRM enabled in Get Shouting, and an active Abandoned Cart journey configured.
Option 2: Manual API Key Entry
Step 1: Generate API Keys in WooCommerce
- Log in to WordPress admin
- Go to WooCommerce → Settings
- Click the Advanced tab
- Click the REST API tab
- Click "Add Key"
- Configure: Description "Get Shouting Integration", User with access to orders/products, Permissions Read/Write
- Click "Generate API Key"
- Important: Copy the Consumer Key and Consumer Secret immediately. The Consumer Secret will be hidden if you try to view the key again.
Step 2: Open Get Shouting Account
- Log in to Get Shouting at getshouting.app
- Go to Account → Social & Brand Settings tab
- Click "Connect Store"
Step 3: Select WooCommerce
In the Connect Store dialog, select WooCommerce. Choose "Option 2: Manual API Key Entry" in the flow.
Step 4: Enter Credentials
- WooCommerce Site URL: Full site URL (e.g., https://yourstore.com). Must use HTTPS. No trailing slashes or paths.
- Consumer Key: Paste from WooCommerce (starts with ck_)
- Consumer Secret: Paste from WooCommerce (starts with cs_)
Click "Connect"
Step 5: Verify Connection
If successful, the dialog closes and the page refreshes. Your WooCommerce store appears in the Store tab with status "Connected". Click "Sync Now" to manually sync products (optional).
Troubleshooting
"Failed to connect to WooCommerce site"
- Check HTTPS: Site must use HTTPS
- Check Permalinks: Settings → Permalinks — ensure not using "Plain"
- Verify Keys: Full Consumer Key and Secret, no extra spaces
- User Permissions: API key user must have access to products and orders
"Consumer key is missing" error
Some servers don't parse the Authorization header correctly. Try the Get Shouting plugin instead (uses Query String authentication).
Plugin connection fails
- Verify plugin v1.1.0+ is activated (Plugins → Installed Plugins → Get Shouting)
- Ensure WooCommerce 5.0+ (8.9+ for SMS consent in block checkout) is installed and active
- Check site URL in WordPress Settings → General (must be HTTPS, no trailing slash)
SMS consent checkbox not showing at checkout
- Confirm plugin v1.1.0+ is active
- For block-based checkout: requires WooCommerce 8.9+
- Ensure SMS CRM is enabled in Get Shouting Account → Settings
Abandoned cart journeys not firing
- Confirm plugin v1.1.0+ is active and WP-Cron is running (or a server-side cron is configured)
- Ensure Email CRM is enabled and an Abandoned Cart journey is active in Get Shouting
- Cart events fire after 30 minutes of inactivity — allow time to trigger
Localhost testing
Get Shouting serverless functions may not reach your local domain. Use a tunnel service (e.g., ngrok) to expose your local site.
Disconnecting
Account → Social & Brand Settings tab → Click "Disconnect Store". If you used the plugin, you can also disconnect from WooCommerce → Get Shouting → Disconnect.