How to Create, Download, and Publish an Ad
Create ad creatives with customizable overlays, bar layouts, logos, CTAs. Download a ZIP of your Ad assets and/or schedule to publish to your connected social accounts.
After selecting "Create Ad" from the Create page, selecting "Create Ad" from your store, or selecting an Ad from My Ads, you'll land on the Ad Preview page. This is where you finalize your Ad and assets before scheduling or downloading your Ad assets.
Review and Finalize Your Ad
The Preview page is where you finalize your Shout before scheduling or publishing. This is Step 2 of 3 in the Create an Ad process.
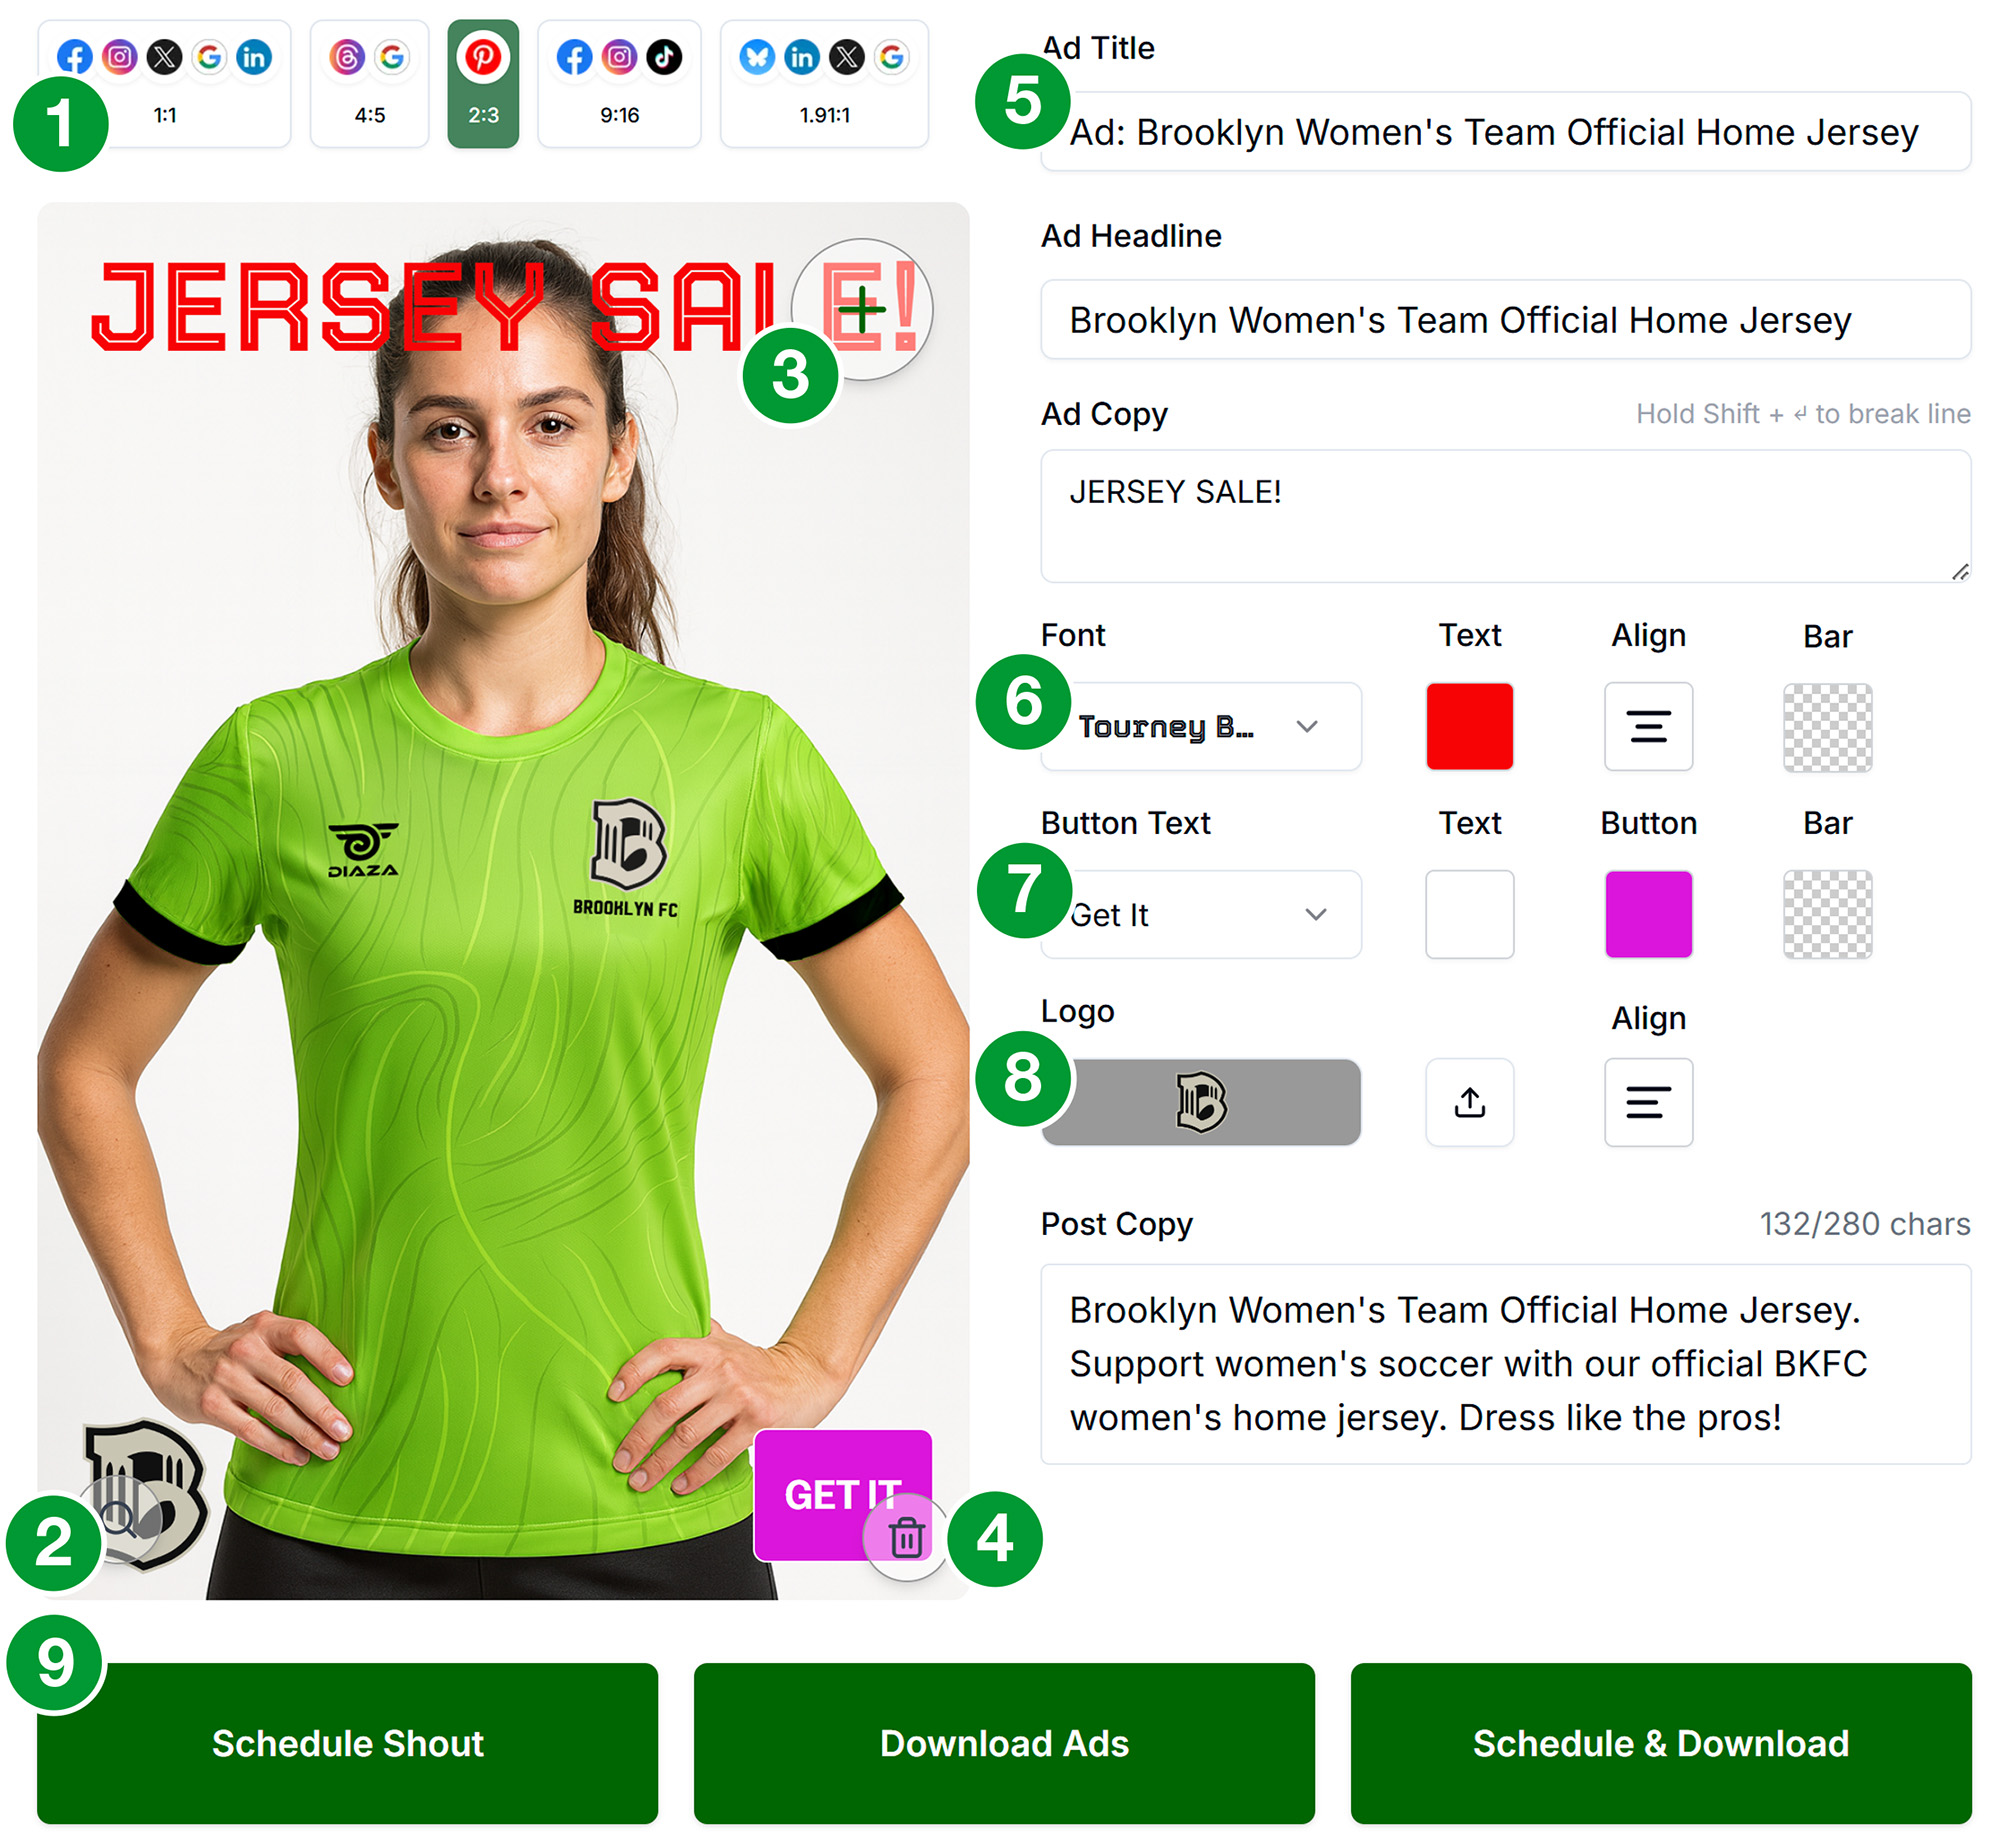
The Interface
- Aspect Ratio Switcher Social platforms are organized by aspect ratio. Click the different aspect ratio buttons to see the different views. Make sure you edit the zoom and cropping of your assets for each aspect ratio to ensure you are publishing what you want. We call this view window the Asset Preview.
- Zoom Zoom in/out on your image. Drag the image to rearrange or crop.
- + The "+" icon in the top right of the Asset Preview adds assets. Clicking it will open the Upload Box. You can upload new images by selecting them from your computer or Asset Library. You can also drag new assets onto the Upload Box. Once an asset has been added to your Shout, it is also added to your Asset Library. If you want to change your main Ad image, delete the current one and add a new one. You only need one image for your Ad.
- Trash The Trash button will delete the asset from your Ad. If the Shout has not been saved or published, and the asset is not used in any other Shouts, it will also delete it from your Asset Library.
- Text Fields: Based on the individual platform capabillities, we combine the fields to properly format your posts.
Ad Title: Ad title is the name of your Ad. This is only used internally, and is the title you will see your Ad displayed in the My Ads section.
Ad Headline: The headline of your Ad publishes as the post title on some platforms. On other platforms, it is folded into the post body. This is only used if you decide to schedule/publish your Ads.
Post Copy: Post copy is the main caption or post text. This is the text that will be displayed on the social platform. Use Shift+Enter to add line breaks. Remember to include a Call to Action (CTA). Shorter posts are generally better; targeting 150-300 characters total for most posts. The Post Copy will be the same for all platforms (length permitting). There is a helpful character counter that includes Ad Title, Ad Copy, and Brand URL. This is only used if you decide to schedule/publish your Ads.
Ad Copy: Ad Copy is the main mesage of your Ad. Use Shift+Enter to add line breaks. We strongly recommend keeping your Ad copy short and sweet, and no more than 3 lines. Your Ad Copy will be dynamically sized based on how much text you enter, so the fewer characters you use, the larger your message will be. - Top Bar Settings This section styles the Ad Copy for your Ad. Choose your font, set your text color, pick your alignment, and decide whether you want a background color for the top bar. The bar and text are dynamically sized, and will adjust to the text you enter.
- Bottom Bar Settings This section is the branding and CTA section for your Ad. Choose your CTA message, the text color of the CTA and button color. You may also set a background color for the bottom bar. The CTA button will not actually function as a button, it is simply a visual element meant to entice the user to click the link.
- Logo Settings Upload your logo from your computer or select one from your Asset Library. You can also choose the alignment of the logo. If the logo is aligned left, the CTA button will appear on the right, and vice versa. If you want to replace or switch your logo, you can just upload the new logo and the old one will automatically be deleted.
- Schedule & Download For Ads, you are given 3 options of actions.
Schedule This will schedule your Ad to publish to your connected social accounts. You will be taken to the Schedule Selector page to select the platforms and date/time.
Download This will download a ZIP of your Ad assets. This is incredibly helpful if you are purchasing paid social Ads on different platforms. Unfortunately, we cannot set up your paid ads, as none of the platforms have opened that functionality to third parties.
Schedule & Download This will download a ZIP of your Ad assets AND schedule your Ad to publish to your connected social accounts and download a ZIP of your Ad assets. You will be taken to the Schedule Selector page to select the platforms and date/time.
Step 1: Create an Ad Shout
Option A: From Create Page
- Click +Create in the main navigation
- Enter an Ad name (or use auto-generated)
- Click "Create Ad"
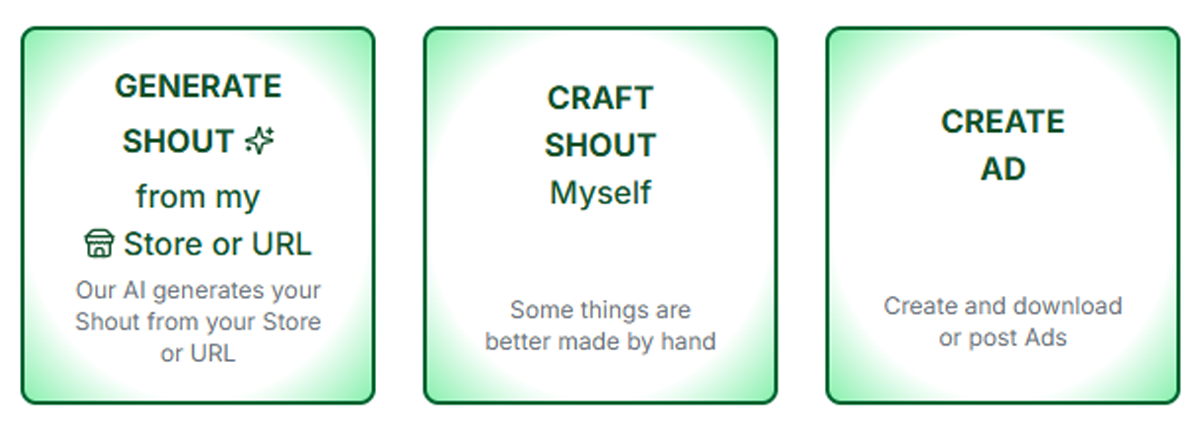
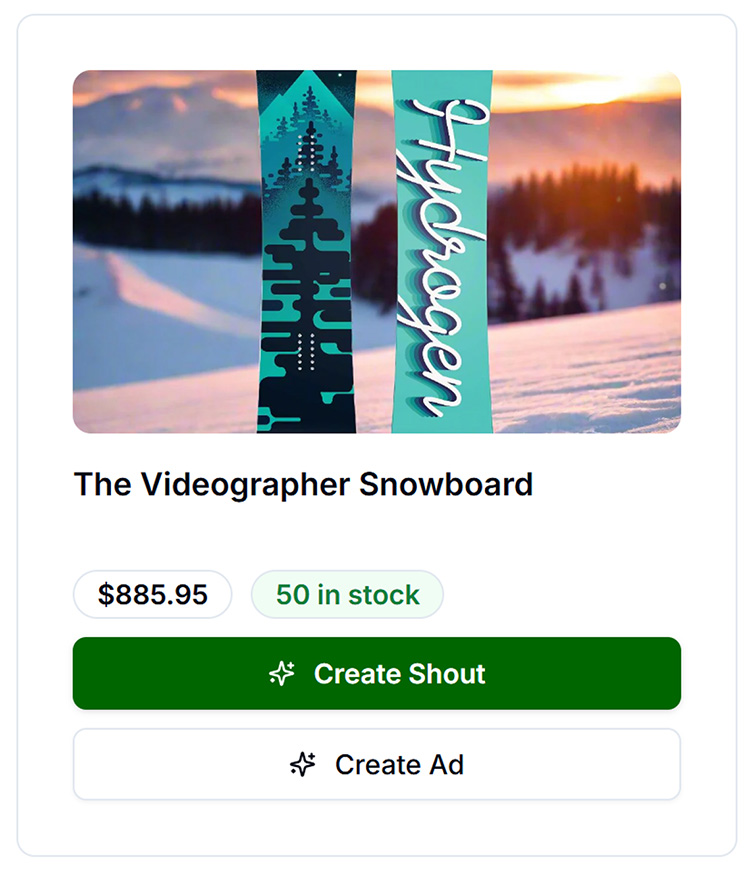
Option B: From Store (Product-Based Ad)
- Go to My Store
- Find a product
- Click "Generate Shout" or "Create Ad" if available
- If taken to regular Preview, switch to Ad mode if there is a toggle
Step 2: Add Assets & Finalize
- Add an image: Upload, Library, or Store. To replace your image, delete the current one and add a new one.
- Adjust: Zoom and position your main image for each aspect ratio
- Ad Title: Overall title for the Ad (for internal use)
- Ad Headline: The headline of your Ad publishes as the post title on some platforms. On other platforms, it is folded into the post body. This is only used if you decide to schedule/publish your Ads.
- Ad Copy: Main message overlay (e.g., "Summer Sale 50% Off"). Copy will be sized dynamically, so the fewer characters you use, the larger your message will be. Use Shift+Enter to add line breaks.
- Font: Choose from available fonts
- Text color: Color picker for overlay text
- Text alignment: Left, Center, Right
- Top bar color: Color of the top bar
- CTA type: "Shop Now", "Learn More", "None", etc. The CTA button will not actually function as a button, it is simply a visual element meant to entice the user to click the link.
- CTA text color: Color of CTA text
- CTA button color: Color of the CTA button
- Bottom bar color: Optional separate bottom bar color
- Logo: Upload or select a logo from your Library. Change your logo by uploading a new one and the old one will automatically be deleted.
- Logo alignment: Left, Right. The logo aligment will automatically position the CTA button on the opposite side.
- Dimension Check: Make sure you check how your Ad will display in all the different aspect ratios. The system will automatically crop and resize your Ad to the correct dimensions for each platform.
Step 3: Schedule & Download
A. Schedule
Click "Schedule Shout". The system creates flattened ad assets and prepares them for publishing. You'll be taken to the Schedule Selector page to choose the date and time to publish your Ad.
B. Download Ads
- Click "Download Ads"
- The system creates flattened ad assets for all selected platforms/dimensions
- Your browser will automatically download a ZIP file containing all your Ad images
- Use the images in Meta Ads Manager, TikTok Ads, Pinterest Ads, LinkedIn Campaign Manager, etc.
C. Schedule & Download
Click "Schedule & Download". The system does both: creates assets for scheduling AND generates the ZIP for download. You'll be taken to the Schedule Selector page to choose the date and time to publish your Ad.
Troubleshooting
"Create Ad" or ad mode not visible
Ad features may require a PRO+ or higher plan. Check Account → Billing.
"Download Ads" creates empty or failed ZIP
- Ensure at least one image asset in the ad
- Ensure at least one platform selected
- Try making a small edit and saving before downloading
Assets look wrong (text cut off, wrong colors)
- Adjust bar heights if the interface allows
- Verify ad metadata is saved before downloading
Schedule Shout fails
Verify social accounts connected, at least one asset and one platform selected.